Saturday, April 24, 2021

7 Artisans 18mm f6.3

The 7 Artisans 18mm f6.3 "UFO lens" arrived yesterday. Like the Pergear 10mm fisheye before it, this is another $69 lens that comes with low expectations and plenty of opportunities to impress.

The 7 Artisans "UFO" lens (after 'stealthing')

As others have said, there is heavy vignetting with this lens (easily fixed in post) and the corner sharpness is not fantastic. Center sharpness, does however seem quite good and this extends to the edges (though not the corners). For my style of photography, the lack of perfect corner sharpness is rarely an issue.

Distortion seems to be minimal or non-existant 

It's a very compact and solid lens and, like the Pergear 10mm fisheye, it's a fixed aperture - f6.3. Also, like the Pergear, it works well with the camera set to auto shutter speed and auto ISO - it turns the X-E3 into a high-quality point-and-shoot which is great for a very compact, pocketable, walk-around camera and lens combo. It has a fixed focus, extending from about 1m to infinity.

Fixed focus down to about 1m

With its completely meaningless, white, clock-face markings it's rather a gaudy looking thing; something I remedied with a couple of minutes and a black permanent marker. In this new, 'stealth', mode it looks very discrete on the X-E3.

The first batch of photos from this lens was impressive. 18mm gives about a 90-degree field of view - almost half that of the Pergear 10mm, and noticeably wider than the Fuji 27mm f2.8 lens. So, between the three lenses, the UFO lens occupies a sweet spot in the middle.
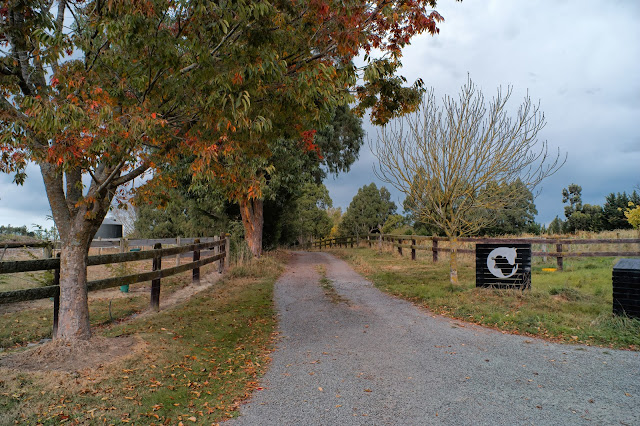
Soft corners visible to pixel peepers

So, what's the verdict with this lens? Well, it's not perfect but it is good enough. Good enough to make  pictures with nice image quality - which, at the end of the day, is what it's all about. But the real reason for this lens existing is convenience and price. Attached to the X-E3, it conveniently fits in a pocket, conveniently requires no settings, and in public, conveniently looks about as intimidating as a Gummy Bear. For $69 what's not to like?

Note: These photos are  NOT straight out of the camera. They are uncropped, but have all been processed to remove vignetting and provide a standard 'look'.

Wednesday, April 14, 2021

Using the Minolta Hi-Matic 9

 Back last November, I wrote about another film camera arriving. Well, I never got around to showing the pictures - better late than never, I suppose!

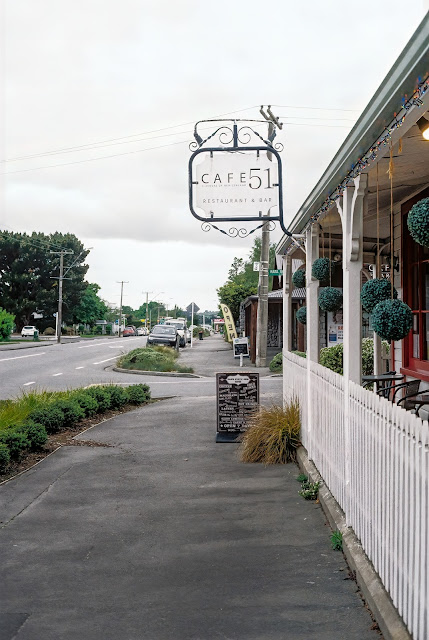
After checking over the Minolta Hi-Matic 9, I loaded a roll of 35mm Kodak Gold film (ISO 200) and went for a walk around the town. Except for one shot, I left the camera on Auto to test how well the light metering worked. More about that later.

Preparing the camera


Loading film into the Hi-Matic 9 was straightforward and as easy as most other 35mm cameras of the era. The film winding lever has a longish throw but is sturdy and smooth, coming positively to a stop when the film is wound on. It provides confident feedback that everything is just as it should be in the film winding department. The shutter is locked after each exposure and is only activated by winding on the film, so no double exposures here - intentional or otherwise.

Underneath the lens is a small lever that activates the metering system and sets the ISO speed of the film being used. Before shooting this has to be positioned from "OFF" to the ISO of the film in use. Once this is set, there is a battery check procedure, accessed by turning all the dials on the lens (shutter, aperture, focus) to the "check" mark. If the needle in the viewfinder hovers in the correct position, then the battery is good and the metering should work correctly.

Using the camera


With the camera set to auto, using the camera is simple - compose, focus, shoot. There really isn't anything complex here and the digital photographer might only be thrown by the lack of autofocus. The viewfinder, is a typical rangefinder, split-image type. Bring the two images together and you will be in focus. If you are not used to rangefinders, it may take a little getting used to but, once you know what to look for, focusing is both quick and accurate.

Setting a fixed focus for quick-action street shooting using zone focusing, is also possible but there is no depth of field scale on the lens, so you will need to know what you are doing or reference the camera manual for a depth of field scale (p27). Also, the focusing ring moves quite freely, so it is easy to knock out of focus if you aren't careful.

Like the long travel film advance, the shutter release also travels through a long distance (11-12mm). It takes a little practice to release the shutter smoothly as the tendency is to jerk the finger down forcefully after the first few mm of inaction. A hair-trigger this isn't, but practice makes perfect.

To change from completely auto mode, a lever on the lens needs to be depressed and a shutter speed selected. With the aperture ring still set on auto, the camera will choose an appropriate aperture to match the shutter speed. Moving the aperture ring from auto, puts the camera in fully automatic mode with camera settings under your complete control and the EV meter in the viewfinder to guide your decisions. Whatever your skill level, there is a way of using this camera to suit.

The results


I am pleased to say that every shot on the roll ended up correctly metered by the camera. However, the shortcoming of this fully automatic system is that the camera settings are adjusted on a scale from 1/15 sec at f1.7, up to 1/500 at f16 and there is no visual feedback that allows the user to know what settings are in use. Consequently, at least one exposure of a dark scene was made with a very slow shutter speed and camera shake was evident in the final result. Lesson: once the light begins to fail, take over control of the camera, or make sure that you have a high ISO film loaded.

Personally, I like the results; there's a quality to the colours that is quite different from digital and the highlight grading in cloudy sky is, again, hard to replicate with a purely digital image. The scanned images were sharp and got similar post-processing to my digital images. So, all in, the Minolta Hi-Matic 9 and Kodak Gold 200 film, get the thumbs up from me.